Originally we were going to leave this project until we tackled the upstairs hallway, but since it was a rather large eye sore and I was staining the vent covers and stair nose for the downstairs staircase I decided now was as good a time as any to strip and stain the upper staircase. Little did I know that this would turn out to be a domino project.
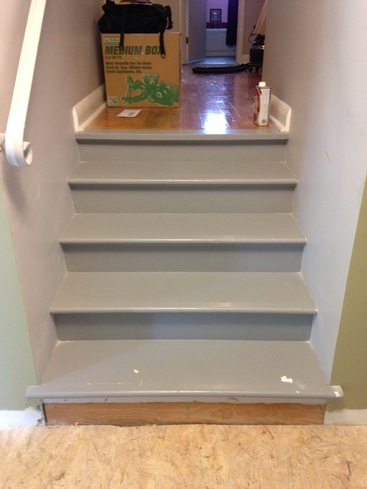
When we pulled the old baseboards up, red oak was revealed on the bottom riser. I was pleased as that meant I could strip and refinish the existing stairs just as I had done at our old house. The plan was to stain the treads dark to match the new hardwood and paint the risers white to match the future board and batten half wall.
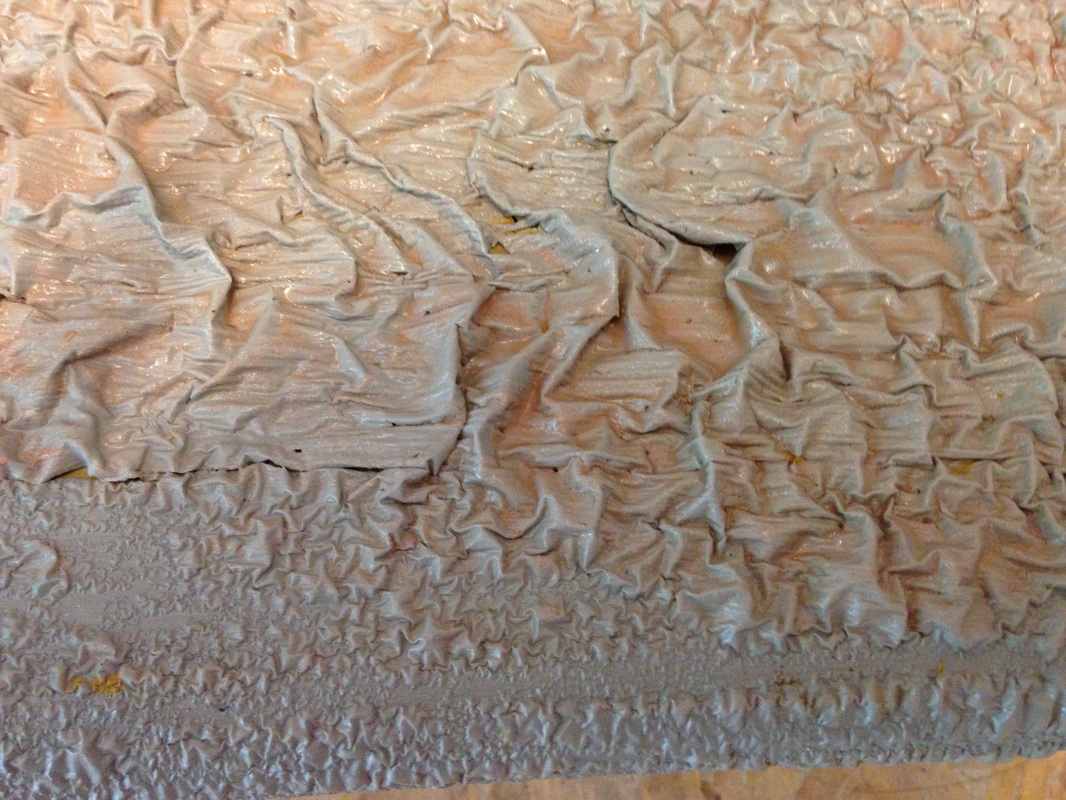
And so I began by applying a gel paint stripper, letting it sit for 20 mins and scraping off. This required multiple applications as there were several layers of paint on the stairs.
And so I began by applying a gel paint stripper, letting it sit for 20 mins and scraping off. This required multiple applications as there were several layers of paint on the stairs.
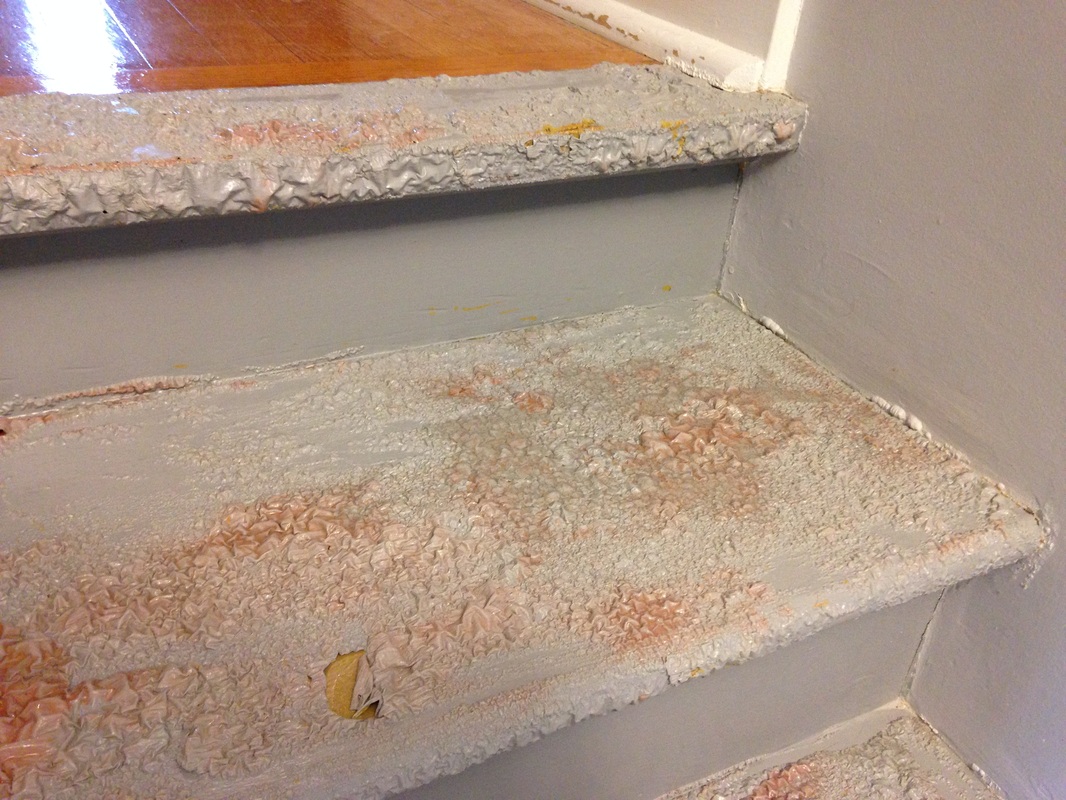
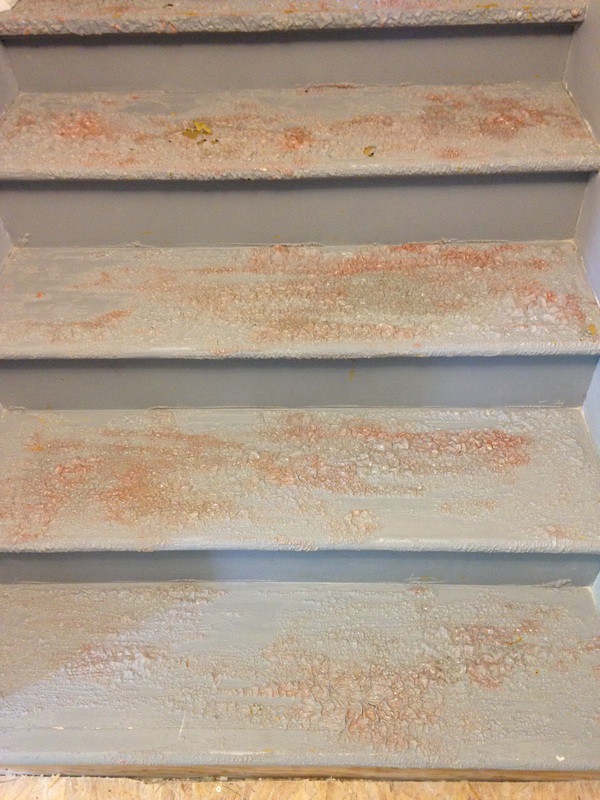
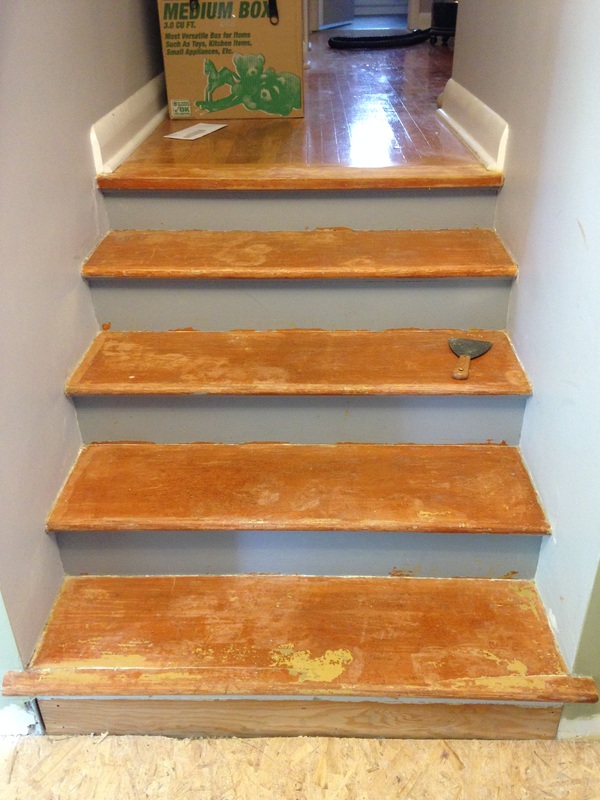
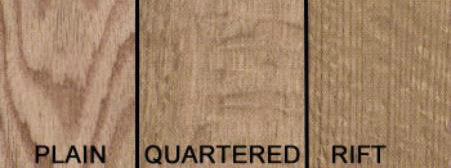
Well about 6-7 hours in to the stripping and sanding process I realized the treads were not what I was hoping for. There are different ways of cutting wood, and in this case the risers were cut "plain" and the treads were cut "rift". I was hoping for the veined look of "plain" cut on the treads and didn't care about the cut of the risers as I was painting them white. Complete bust!
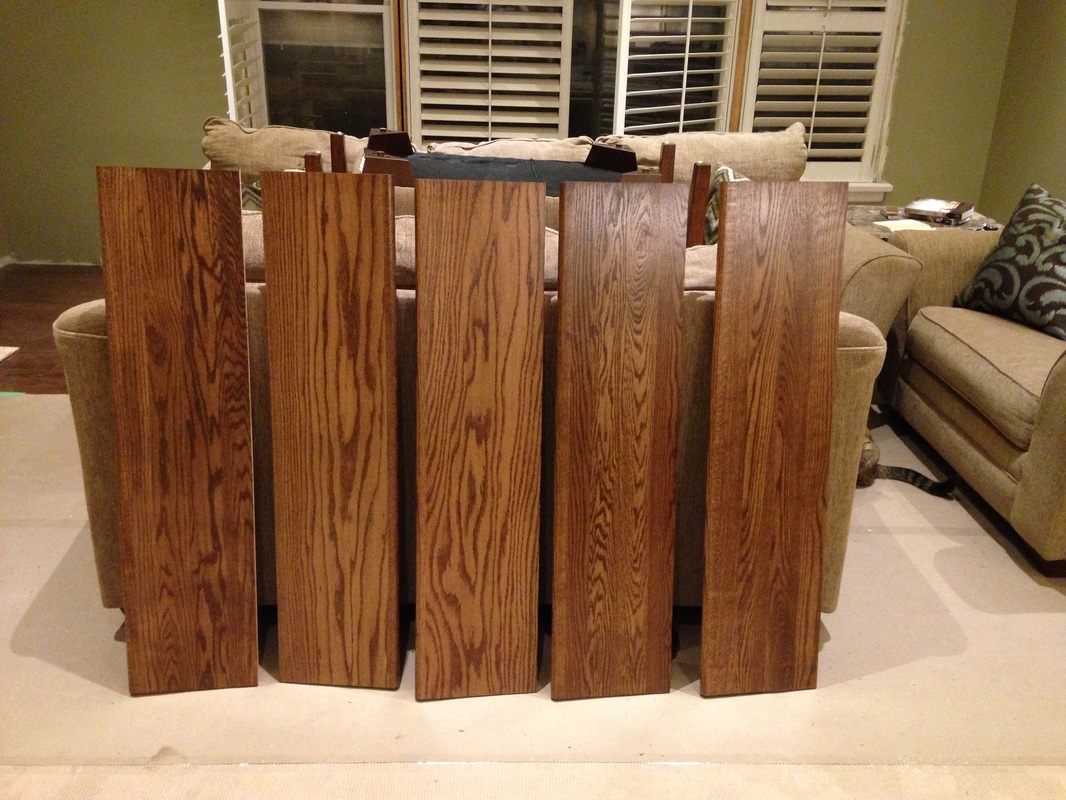
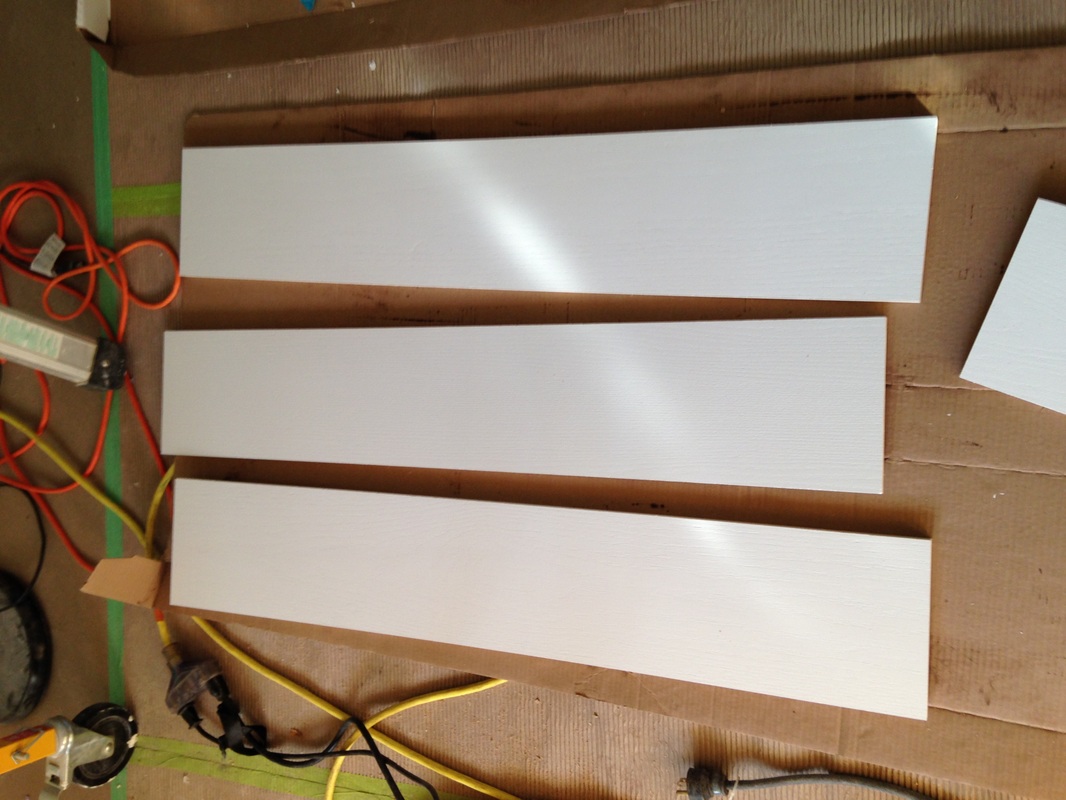
So after a little Googling I was off to Home Depot where I purchased a stair tread and riser kit. For simplicity I decided to stain and seal the treads and prime and paint the risers before installing. I ended up applying two coats of stain & 5 coats of sealer on the treads, and 2 coats of primer & 3 coats of white trim paint to the risers.
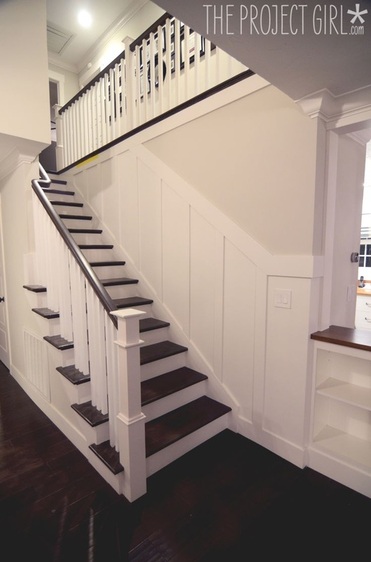
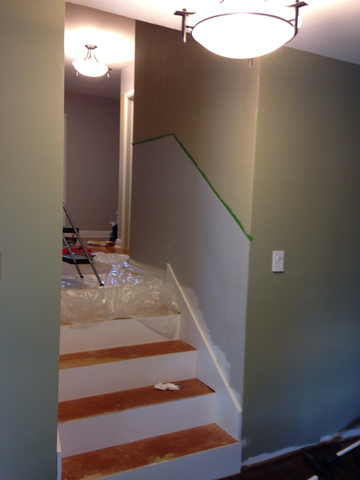
The ultimate plan for the upstairs hall area is to create a board and batten (B&B) half wall starting at the stairs, like so (image from The Project Girl)
Since the decorative stringer would be much easier (and give a more polished look) to install before the new treads and risers go on, I suggested that it was best to tackle the board and batten in the stairwell and part of the upstairs at this time. Oh, my husband is such a good sport.

The first step of the staircase renovation was to cut the nosing off the old treats.
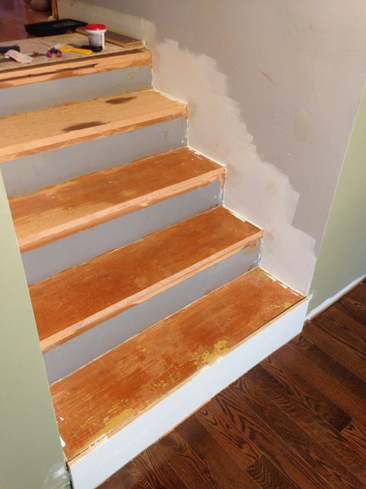
Next Ty measured and cut the boards for the decorative stringers and fastened them to the wall with a nail gun. The seems don't have to be 100% tight at this point as they will be covered by the new risers and treads.
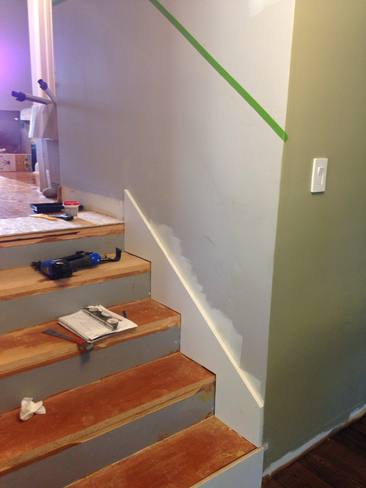
When installing the risers working off of old stairs can be tricky as generally nothing is square, therefore using an angle finder is crucial to obtaining a tight fit.
Meanwhile, I painted the upper section of the wall with a colour match of "Bennington Gray" by Benjamin Moore (HC-82) in Dulux LifeMaster paint. The lower half of the wall will get painted with white trim paint one the boards go up.
 |  |
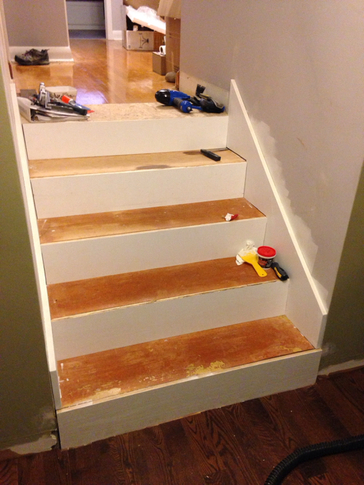
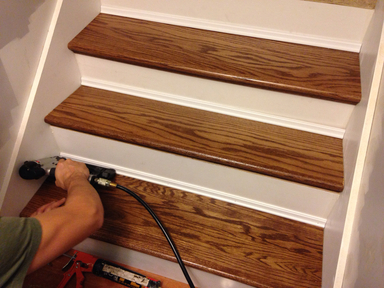
Next Ty used his angle finder and tape to measure and cut the treads. Again, he secured them in to place using PL Premium and his 16 gauge nail gun. Our existing stair treads were made slightly deeper than standard so we used pine panel moulding painted white to cover the gap. We supported them with scrap pieces of hardwood and again used the nail gun to secure. Later in the project the nail holes will be filled, the seams will be caulked and I'll give all the white areas one last coat of paint.
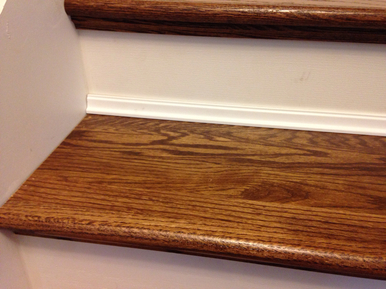
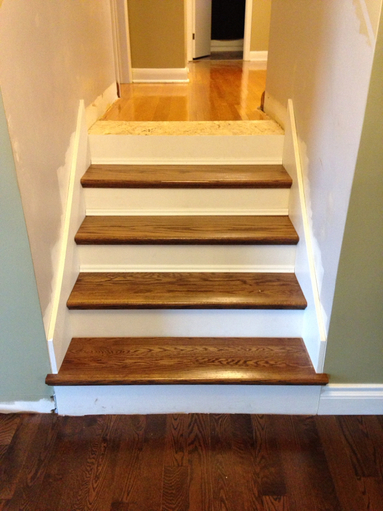
Ty cut the bottom stair slightly different in order to create a return on the bottom step. I recently purchased and stained a matching bull nose piece that will wrap around back to the wall to give it a more polished look. The top tread also still needs to be cut and fastened and then we will be able to move forward with the Board and Batten to complete the project.
To be continued...
 RSS Feed