- Standard White Peegee Hydrangea Tree (1)
- Dwarf Burning Bush (1)
- Hostas (6)
- Euonymus (1)
- Globe Cedars (4)
- Hydrangea (3)
- Sedum (2)
- Alium (1)
Welcome to "Our Nest Egg" the blog featuring the transformation of our 1960's all original to our dream home. |
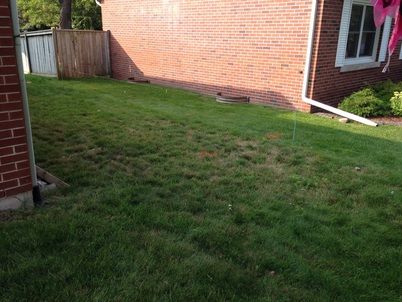
When we moved to our Falcon home, there was very little in the way of a garden in the front yard and absolutely no garden in the back yard. 
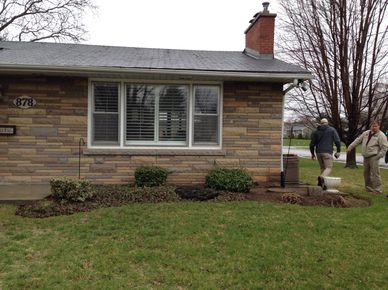
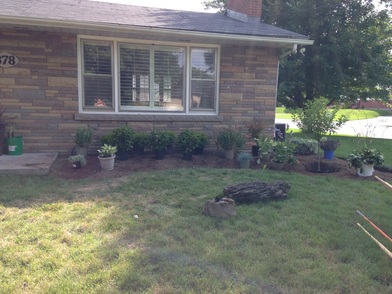
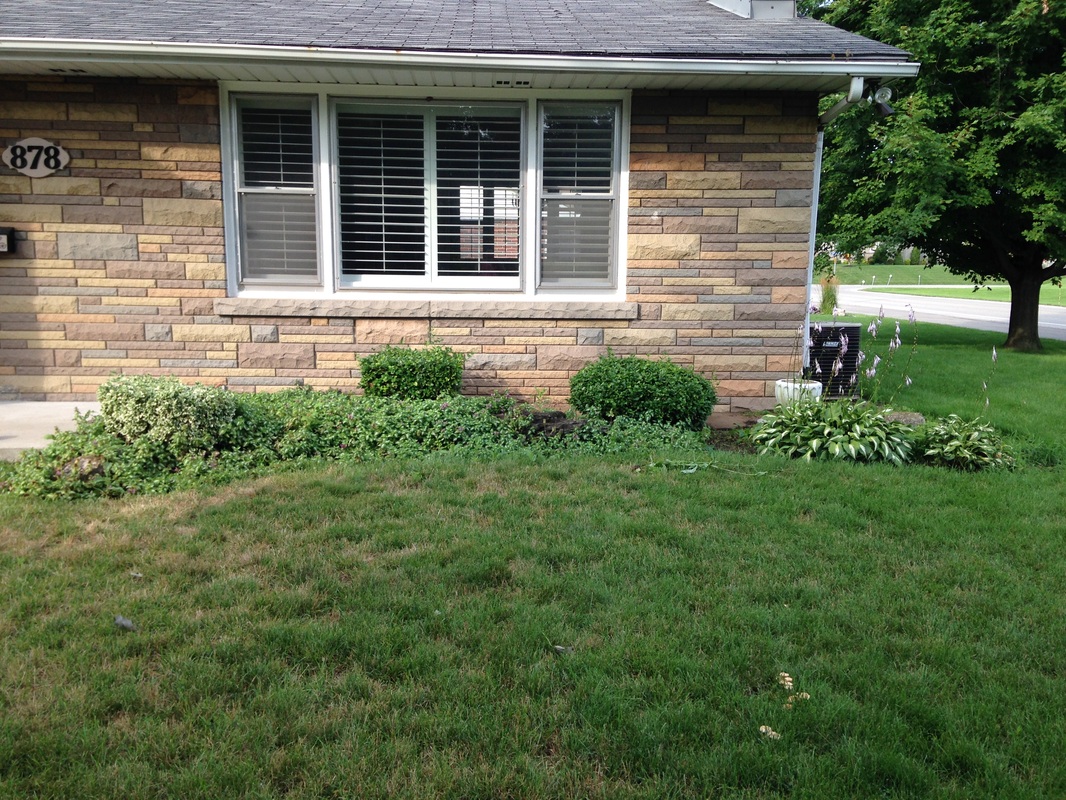
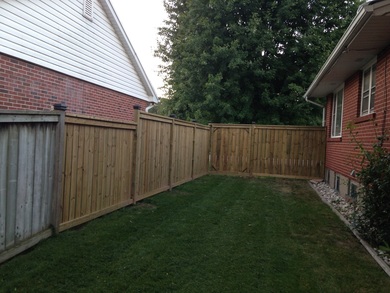
This is what the garden looked like when we purchased the house. I knew I wanted to give it a little TLC as soon as possible. 
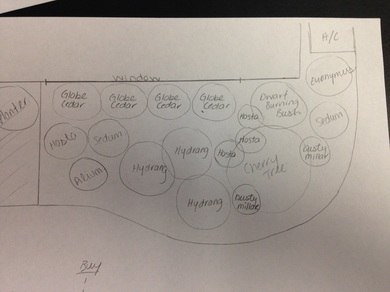
I sketched out a rough idea for a new design and found a few plants were salvageable from the existing garden. 
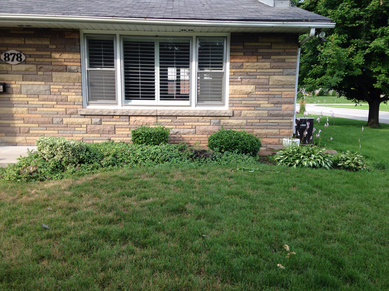
By the time we moved in 3 months later the garden had filled in quite a bit, but it still didn't cut it for me. Before we moved I divided some perennials from the old house to plant at the new house. I developed a weird attachment to my garden at the old house and this way I could bring some of it with me and also save money. Double bonus! 
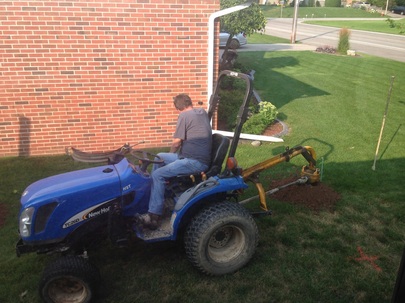
Once again my fabulous friend Danielle came by to help me out. We started off by transplanting the Euonymus and Hostas and disposing of everything else. Next came re-shaping & edging the garden. It was HOT out and this was hard work, I was so thankful to have Danielle there to give me a hand. 
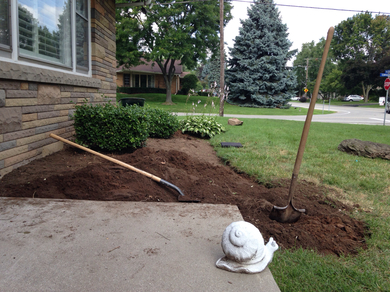
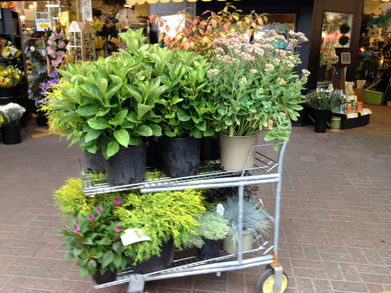
After a quick trip over to Holland Park Garden Gallery I had everything I needed. Some of the items from my original design were sold out for the season so I replaced them with similar items. 
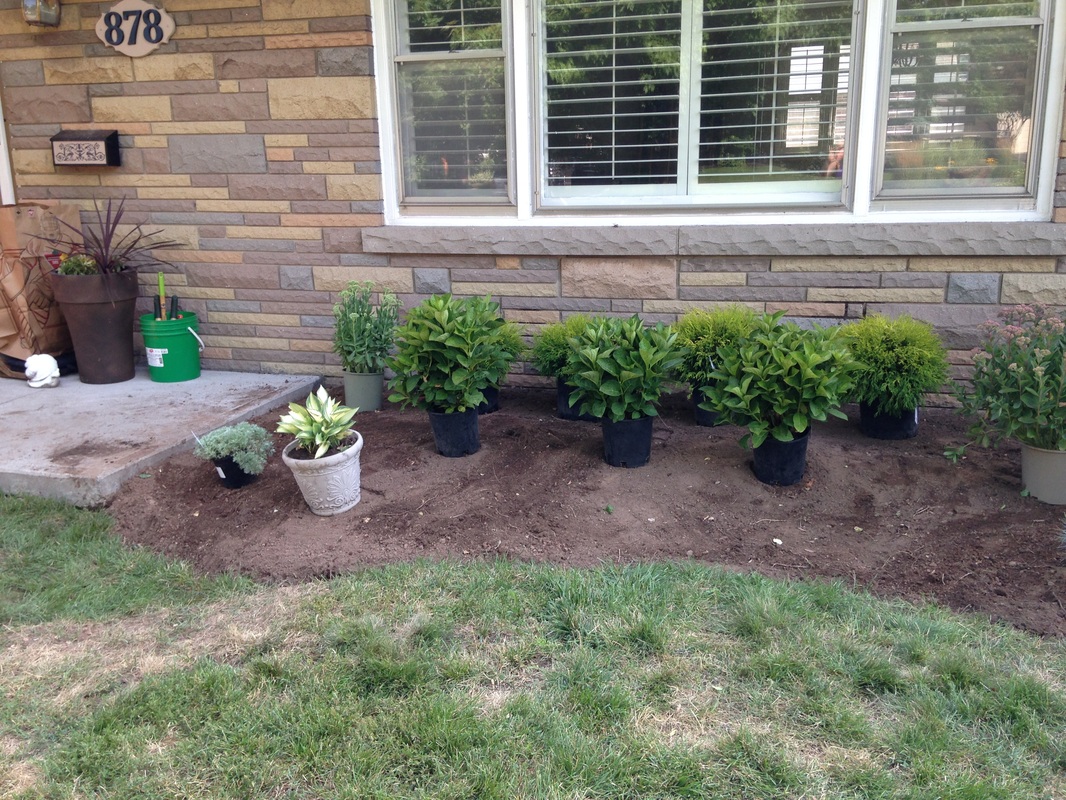
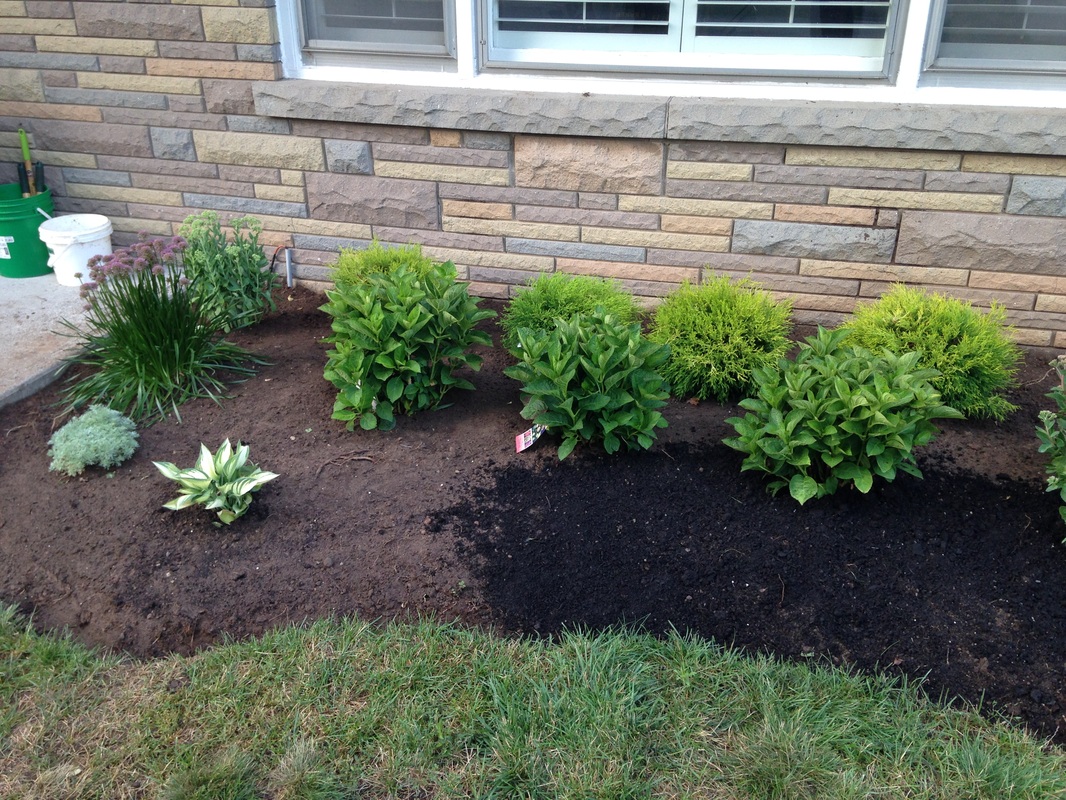
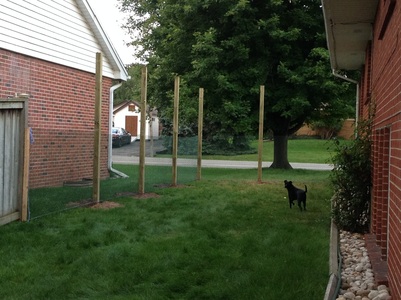
Before I dug I positioned the items where I wanted them in the garden and made a few modifications. It was starting to come together already! 
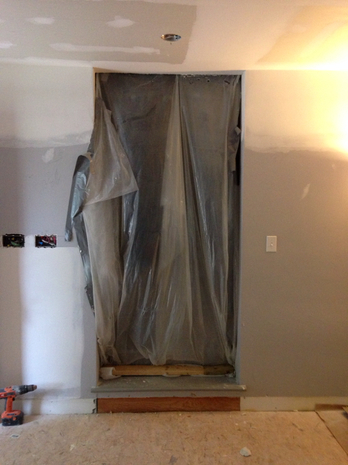
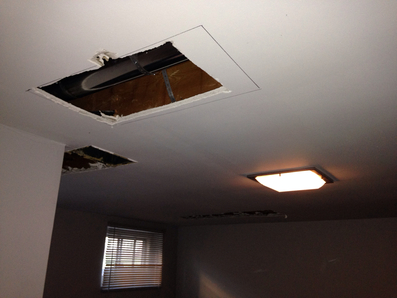
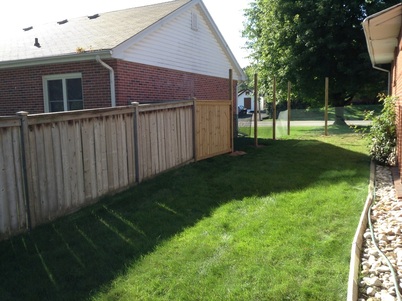
The garden was looking so much better already. Home Depot had a great sale on mulch so I purchased 15 bags with the intent on spreading it right away. Time slipped away from me and the mulch sat at the top of the driveway for the past 2 months. As it turns out, this was a good thing as with all the construction mess the garden took a bit of a beating. Also, I was able to plant hundreds of spring flowering bulbs last week without contending with the mulch. I planted a row of layered hyacinths and crocuses along the border, and a few clumps of daffodils and tulips throughout the garden. I can hardly wait to see how it looks come spring time. 
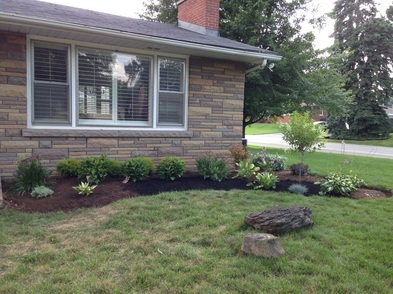
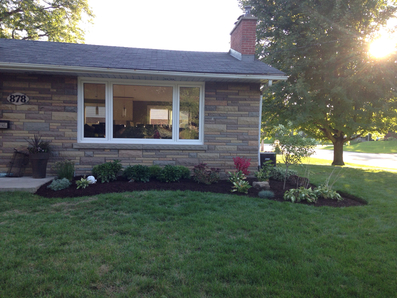
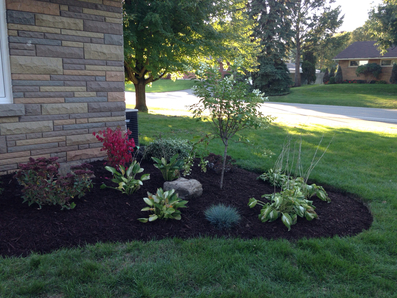
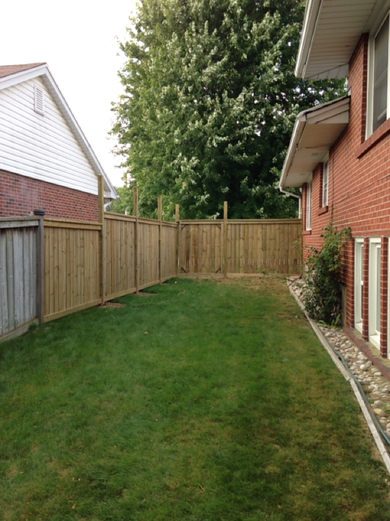
And here's the finished garden: 
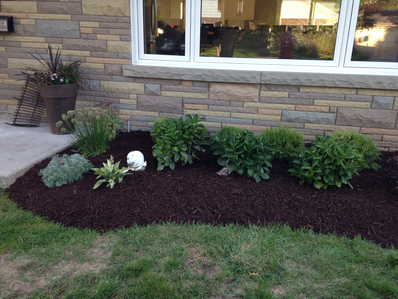
Next year I plan to add annuals in front of the hydrangeas and in other empty spots to add a lot more colour. BEFORE / AFTER Planting List:
- Standard White Peegee Hydrangea Tree (1) - Dwarf Burning Bush (1) - Hostas (6) - Euonymus (1) - Globe Cedars (4) - Hydrangea (3) - Sedum (2) - Alium (1)
0 Comments
(Please note, I purposely did not clean up before taking the photos in this post as I want to give you a true representation of living through a major renovation.) QUESTION #1: How is it living in a construction zone? One of the questions I have been asked the most during this period of renovation is, "how is it living in a construction zone?" Some people who come through the house are positively shocked that we are living there while completely gutting & renovating the main floor. Probably the single most important thing for me has been having a clean bedroom. No matter what is going on in the rest of the house I know I can escape to our bedroom. I make an extra effort to vacuum and dust in there every couple days, make sure we always have clean sheets, a made bed, and as little clutter around as possible. There have been days where this is the single clean room to escape to grab a bite to eat or relax for a few minutes. This was especially important when the electrical and HVAC was being redone and I lost the use of the basement TV room for about a week. QUESTION #2: How are you keeping the rest of the house clean? Simple answer, we're not. While it's a loosing battle, we are trying our best to minimize the amount of dust and debris that gets transferred to the other areas of the house. For starters, to limit dust circulation we had to shut off the AC when we began demo. No air conditioning in Burlington in August would normally be unbearable, but I think we are the only people who have welcomed the unseasonably cooler temperatures. For the upstairs level we stapled a plastic drop cloth to the ceiling over the stairs and we secure the bottom with planks of wood. I also make sure all the bedroom and bathroom doors are closed before work begins. Again, this isn't perfect but it does help minimize the amount of dust that gets upstairs. Evidently the main floor has been the hardest to keep clean. One thing that has really helped is doing a sweep of the main floor at the end of every day. No matter how late we finish work for the day, I always make sure the garbage is run out to the bin and the floor is swept. It's not perfect by any stretch of the imagination, just a quick sweep. In addition to stopping transfer to other areas of the house, it allows our pets to have free run of the house at the end of the day and in the early mornings. An industrial fan and two window fans have also really helped clear the dust out of the air. The same goes for the lower levels. We close the door at the top of the stairs and I have another plastic drop sheet hanging at the bottom. Around the 3 week mark the lower levels of the house got pretty bad. All the drilling for electrical, removing and replacing HVAC systems, and everyone stomping through in their work boots built up to quite the mess. In addition, large sections of ceiling plaster were cut above our basement couches which resulted in dust and plaster bits all over our couches and carpet. That weekend my parents were sanity-savers and came over and both cleaned for about 4 hours straight. They also brought and made lunch for us "labourers". Later that night, for the first time since moving in, I walked across the floor in bare feet. QUESTION #3: What are you eating? When you go 6 weeks without a kitchen, people start to wonder, "what are you eating?". Well my first answer would be not much. I tell you, I have discovered the "miracle" loose fat/ gain muscle program, renovate your house! I estimate that I have dropped about 4% body fat and I have been feeling super strong! If we ever get a spare moment to get back to the climbing gym I think I'll be back to climbing 5.11 pretty quickly. But in all seriousness, I set up a make shift kitchen in the garage which worked out very well. On moving day I had the guys bring the old fridge from the kitchen down to the garage. I set up a microwave, toaster and coffee machine on top of the deep freezer and we have been using the BBQ out back quite a bit. Mostly we eat on the patio in the side yard, but one cool and rainy evening I brought our spare patio table and 2 chairs in to the garage and have left them there since as I find it to be a very convenient prep table. To make life easier, we mostly use paper plates and disposable cutlery, but some things do have to be washed by hand. This takes place down in the laundry room. QUESTION #4: Where are your pets? They are here with us! Chloe is still in her crate for the bulk of the day which has actually made the transition much easier for her. When we adopted her at 9 months she was not potty trained and I suspect she had rarely been outside. While she now knows she isn't allowed to go potty in the house she still goes potty in her crate. When she was about 10 months old I tried downsizing her space to a crate with just enough room for her bed, but she still soiled her bed everyday, even if she was only in there for an hour. After about two weeks of this, in an attempt to save my sanity and her dignity, I came up with the idea of strapping two XL dog crates together to make her a nice big kennel. Now she has a potty space with her puppy pads and her bed area with toys and fresh water. So, Chloe spends her day in her kennel while we are working on the house, or if we have contractors in, just like she would any other work day. I know some people are against crate training, but Chloe loves her kennel and often retreats to it to enjoy a high value treat or slip away for an afternoon nap. As for Miss Mocha, not much has changed for her. The first week we were here I kept her inside completely. I fed her high value wet food in an attempt to convince her this was a good place. After the week was up I let her outside for the first time. At first she was just gone for short spurts and seemed to stay fairly close to home, always appearing quickly when called. These days I suspect she spents a lot of her time hunting over by the golf course. So far she has brought home four trophy mice, and I anticipate many more "prizes" await me. If you have any questions about living through construction chaos feel free to comment and I'll do a second FAQs post.
I have been trying to update my blog every Monday with the previous week's project. To this point there has always been some major project or progress to report on, but now that we are in the home stretch there are multiple projects in progress with nothing quite complete. So, I thought I would post and give you an update on what we worked on last week and what's on schedule for this week. What we worked on in the past week: - stripping the staircase - hardwood - electrical What's going on this week:
- Drywall touch ups - Paint touch ups - Granite install - Kitchen sink & dishwasher hook up - Hardwood completion (I hope!) - Staining and painting the staircase Previous related Posts: Kitchen Design Kitchen Design (Part 2) Kitchen Demo I should start by explaining that we originally planned to design and install the kitchen ourselves. After all, we installed a few IKEA cabinets in the kitchen at the old house and it wasn't so bad (Translation: I only threatened to stab my eye out with the Allen key twice). After a bit of shopping around we came to our senses and decided to have a custom kitchen designed and installed installed. There were three big factors that brought us to this decision: 1- Space: our kitchen is only 11 ft x 12 ft and maximizing every inch of it was top priority. Losing space to fillers and not having the ability to have a fully functional island just wasn't a good choice for this smaller space. 2- Time: The demo of the kitchen, removal of walls and vaulting of ceilings was scheduled to take 4 weeks. With the amount Ty works, the kitchen install would probably take us 2-3 weeks to do ourselves, where as it can be professionally installed in 2-3 days. Sign me up! 3- Investment: Even though we plan to live in this home a long time we are of course always conscious of the investment aspect. Since everyone is familiar with the saying "kitchens sell homes" we knew this was not the place to scrimp on the budget. Let's take one last look at the BEFORE pictures: (Looking at these pictures always make me laugh as they look like they were taken in black and white until you see the pop of colour from the dining room floor) In case you missed "the plan" from my earlier post (Kitchen Design), here are the 3D renderings for the new kitchen: Here is what the kitchen looked like at the start of Kitchen Install Day 1: The installer from Hampton Kitchens was amazing and worked quickly! By the end of Day 1 he had all the cabinets hung and a few cabinet doors/drawer fronts on. Day 2 Progress was slightly slower as it involved a lot of intricate cuts for all the molding. By the end of Day 3 Hampton Kitchen's work was complete! Our new GE appliances were delivered the week prior to kitchen install, so the fridge and stove are already up and running. The dishwasher requires a bit of plumbing so it will be installed shortly. The measurements for the granite counter tops were taken at the end of Day 3 and they will be cut and ready for install later this week. After that we just have to wait for the new window & trim to be installed and then we can hang the back splash. What do you think of the kitchen reno so far? Info:
Custom Kitchen: Hampton Kitchens Cabinet colour: Antique White Island colour: Winchester Hardwood: Caramel Red Oak from Giant Hardwood Paint: Dulux "Lifemaster" paint, tinted with Benjamin Moore "Herbes de Provence" In my post Drywall Complete I mentioned that I spent my entire labour day long weekend painting. Saturday morning the drywallers came back and sprayed one coat of primer on the entire ceiling and most of the walls. They also gave us a quick tutorial on how to use the Titan 330 (professional paint sprayed) we borrow from our friend Jeff. The rest of Saturday was crazy busy and we didn't end up starting our first coat of ceiling paint until about 9pm. We thought it might take about an hour, but there was a serious learning curve to using the Titan 330! By about 11pm frustration and exhaustion had set in and we were ready to abandon painting the ceiling ourselves. In a moment of temporary insanity, Ty even sent out an SOS text message to Jeff. But we pushed through and wrapped up just before midnight. Trying to spray the beams gave us huge problems with over spray in other areas. Once we decided to just roll the beams by hand, things got much easier. Sunday morning Ty & I sprayed a second coat on the ceiling and things were starting to look good. My Dad came that morning to help with the painting and together we tackled the beams. We stood on either ends of the scaffold, painting both sides at once which made quick work of the project. By about 2pm on Sunday we had two coats on everything on the ceiling and I had touched up a few areas. It was looking beautiful! Around lunch time my mom arrived and prepared lunch for all the hungry workers. Apparently Sunday was the day of parental re-enforcement as Ty and his Dad were busy all morning working on building and installing the gate (Fully Fenced Yard). After lunch it was time for colour! You may recall from my post A Bed Full of Paint that I had chosen Benjamin Moore's "Herbes de Provence" for our main floor paint colour. The remainder of Sunday and all day Monday was spent getting two coats of green paint on all the main floor walls. Monday I was left all alone as Ty was at the annual labour day parade supporting the Ironworkers, local 721 (and mass consumption of beer). At least Chloe kept me company and Ciara & Tison did drop by in the afternoon with much needed lunch & ice coffee (thanks again!). It was tricky squeezing myself behind the beams to get right up to the peak. If you are afraid of heights, you may not enjoy standing on a stool on top of rolling scaffold, but this solution worked well for me. I think the room looks spectacular and the green walls really make the white ceiling and beams pop! You may be wondering why certain areas of the kitchen wall are left white. I was running low on paint and being that stores were closed on labour day I decided not to waste paint (or time) on that areas that were going to be fully covered by cabinets and back splash.
We knew from our home inspection the majority of the house was running on copper wire with the exception of 2 aluminum wires running from the panel to the main floor. After pulling down the ceiling we not only exposed the two aluminum lines, we were also left with a spider web of electrical wiring that was quite a mess. Of course with the demo we had to take down all the old fixtures so we have been just over a month without light on the main floor. Given the extent of the renovation, the electrician recommended we basically pull everything and rewire. Within the first day he had all the old lines identified and pulled. Throughout the next two weeks he worked diligently to rewire the main floor and install the boxes for the new lights. He ran wire for the 20 pot lights, 3 hanging pendants for above the island, 1 hanging pendant above the sink, 1 fixture above the dining room table, 1 fixture for the front hall, and 4 lines for the under cabinet lighting. In addition to running wire for electricity in the island, he also added and moved around the light switches and electrical outlets to make them more functional. Being the organized individual (ok, control freak) that I am, I drew on the main floor layout page exactly where I wanted the lights to be and also the light switches. Not to be forgotten was which order they were to be in and which were to be on dimmers. What can I say, I know what I want! O's are recessed lights, stars are normal light fixtures and the red boxes show the light switches. The "grid" pattern illustrates the ridge beam and collar ties. But enough about wires, and more about lights! And co-coordinating Hampton Bay lights for the front hall, back stairs, and dining room. Of course we had to wait until the drywall was up, primed and painted before any fixtures and switches could be installed. It's been a long time coming, but finally the switches are in and the light fixtures are hung. For the first time in almost 5 weeks, let there be light (on the main floor)!
Previous related post: Spray Foam, HVAC & Drywall Last I left off most of the drywall board was hung, but still had a long way to go before being considered complete. This week the drywall crew certainly had their work cut out from them. Everyday when I got home from work it was like Christmas morning. Opening up the front door and seeing what progress had been made that day was super exciting. I hope you enjoy the progression as much as I did... Monday Morning: Monday Evening: Tuesday Evening: Wednesday Evening: Thursday Evening: Friday Evening: All sanded and smooth and ready for paint, which is exactly how I spent my entire long weekend.
Not overly exciting, but certainly a top priority was to get the yard fully fenced in so it was safe for our "puppy" Chloe to enjoy her new yard off leash. For whatever reason the previous owner only fenced in 80% of the yard, leaving a large opening approximately 30ft x 15ft. To save some time & back breaking labour I hired a post hole digging company to come and insert 6 posts which would become the framework for the fence and new gate. While enclosing the yard was a priority, building a fence was not. There was far too much work to focus on inside, so we stapled a snow fence to the new posts to keep the dog safe and so it remained for the past month. Sorry neighbors, renovation life is certainly not glamorous! But hey, at least I splurged and paid the extra $2 for green temporary fencing instead of orange. One afternoon a few weeks back Ty had a few hours to burn and put together the first section of fencing. We decided to match the style of the existing fence, although we are going to bump up the remaining sections to 6 feet to provide a bit more privacy to our new dining room landing deck. The following week he had another couple of hours to kill so he hung the top and bottom boards for the next three sections of fence. Apparently this was becoming a patchwork project. Thursday evening the drywall guys were here working late so again we had some time to work on the fence. Three more sections went up. And finally over the labour day long weekend we had time to devote to building the gate and "finishing" the fence! All that's left to do now is trim the excess off the posts and screw on the post caps. Update: Ty finally cut and capped the posts, so this project is now officially complete. Oh and look, we finally had time to mow the lawn.
Falcon Blvd. was a very busy place to be last week! We had Jerry's Insulating in on Monday, Responsible Heating and Air Conditioning in on Tuesday, and the framing & drywall crew in the rest of the week. I must say, the transformation that has occurred in our home over the past week is truly remarkable. SPRAY FOAM: The best option for insulating the the roof on the main floor was closed cell spray foam. Besides beefing up the rafters to allow for R31 insulation we also had to cover up all the old attic vents. Unlike batting or blown in insulation which needs to breathe, in order for spray foam to work it is essential the space is air tight. I measured and then cut some plywood to the fit the old vent openings and secured them with a few screws. We will deal with the exterior portion of the roof vents when we re-shingle the roof in a couple of years. It took a full day to complete the spray foam, as to achieve the R31 value it takes several passes with the sprayer. The room actually looked pretty cool with a purple ceiling. We decided at the last minute to also spray the outside wall in the kitchen and have it re-drywalled. This will ensure the kitchen is nice and warm in the winter and that the area around the pipes is well insulated. HVAC (HEATING, VENTILATION AND AIR CONDITIONING): With the new open concept layout it was best to have all the existing vents on the main floor eliminated and all new vents run. We are able to cleverly hide the air return vents near the island and the rest of the air supplies are now positioned around the perimeter of the room. I sourced & purchased flush mount registers in Red Oak from Lumber Liquidators that I can stain to match our Red Oak hardwood. I am hoping they will camouflage fairly well in the hardwood. FRAMING AND DRYWALL: On Wednesday the framing and drywall crew started. The first thing they tackled was laying all new sub flooring on the main floor. Then they framed in the area to extend the kitchen wall and removed the old back hall door frame. They also framed in the new front hall closet And completed the framing for the new walls that were previously above ceiling height. Once the drywall started going up the space really transformed. Of course I've had a picture in my head the whole time about how the finished product will look, but seeing our vision come to life is surreal. Well we have reach the moment everyone warned me about, we are now officially BEHIND schedule. The framing and drywall is taking much, much longer than quoted. Somehow 4 days has turned in to 10+. At first I was hugely disappointed, but now that I've had the weekend to process, I've come to terms with it. What's one more week of eating reheated food in the make shift kitchen I've created in the garage and washing dishes in the laundry room sink?
Since my post two weeks ago (Vaulted Ceilings Part 1) a considerable amount of work has been done to satisfy the structural component of this project and we have enclosed the collar ties with cladding. Last I left off we had all 6 collar ties installed, but had only sistered the rafters which held the collar ties. Last weekend we sistered the remaining 42 rafters. We glued the new rafter boards with PL Premium to seal them to the existing and then sunk a couple 3" screws into each end and the middle sections. We followed this up with a nail gun every 4 inches all the way along. This weekend additional structure was added to the sections holding collar ties. Ty used a torch to cut some angle iron and then welded the pieces together to create a brace. What, doesn't everyone's husband weld in their dining room/kitchen? This was actually a huge obstacle as Ty was counting on using his big welding machine that runs off it's own generator, but he (really his brother Ryan who is an awesome technician) couldn't get it running. We ended up buying a new smaller welding machine without a generator, but realized afterwards that it needed a special 40A plug. Ty thought we were going to have to buy a separate generator to run it ($$$), but after listening to so much electrical talk over the past couple of weeks I knew our stove receptacle was 40A, but of course it was not the same plug. After a quick call to our friend Mike, he swept in to save the day (yet again!!!). He met me at Home Depot to show me the right receptacle and then came right over to swap out the stove plug for the new plug and then came back Sunday evening to swap it back. This is what the brace system Ty fabricated looked like pre and post install. Finally the structural component was complete! I mentioned in my last post that the plan was to enclose the collar ties with nice wood and stain them to match the new caramel oak flooring we purchased. The vision was for them to look something like this, only thicker. (Picture from Pinterest) Late last week I started to get nervous that the dark boards would look to "cabiney/farmhousey", make the room look top heavy, or confuse the eye. With so much already going on in the space (kitchen with two colour cabinets, big granite patterns, dark hardwood, dining room and living room furniture, etc.) I was worried there would be just entirely too much going on. So we decided to clad them in wood, paint them white to match the ceiling and trim them in a very simple style moulding. I haven't seen it done before or found any pictures, but I can picture it in my head. It will be vaulted ceiling meets coffered ceiling. (This is a coffered ceiling for those who aren't familiar.) As it turns out we massively underestimated the length of time the projects we scheduled for this weekend. Ty was up until midnight welding on Saturday night and then him & I were up until 3 am installing the cladding last night. This needed to get done before the spray foamers arrived this morning at 8am. Not having this complete would have delayed the entire project at least 2-3 weeks as we would have had to reschedule the spray foamers, held up the framers, drywallers, flooring installer, kitchen installers... While I'm yawning at my desk today & on my third cup of coffee, I am so thrilled we were able to get this done last night. The end result is absolutely beautiful and I know the final product is going to look spectacular.
|