Pevious Related Post: Selecting New Hardwood
Before laying the new hardwood we had to tear up the old tile in the kitchen and front entry and lay new sub floor. Tearing up the old flooring was no easy task. I started on this project by myself and made incredibly slow progress. I thought it was lack of muscle power, but once Ty jumped in to help me out I realized it was just very thick tile layed with solid mortar. When people say "they don't build 'em like they used to", surely they are talking about old homes!

Once we got all the kitchen tile up we discovered the old kitchen sub flooring lined up perfectly with the original hardwood. This was great news as it was one less step for us to get this leveled out. We had already decided to keep the original hardwood under the new hardwood for added insulation. We had this at the old house and I really liked it. We noticed a huge difference in temperature between the rooms that were doubled up and those that were not.
We purchased our hardwood from Giant Hardwood and they delivered all 69 boxes a few weeks early so the wood would have time to acclimate before installation. It is important to allow enough time for the temperature and humidity of the hardwood to match that of the house to prevent the boards from shrinking, expanding, buckling, etc.

As a reminder, here is the hardwood we chose (Red Oak in Caramel). For more on how we selected this hardwood check out my earlier post Selecting New Hardwood.

Finally, it was time to start laying the new flooring! Originally we were going to lay the hardwood ourselves, then we decided to contract it out, but a week before he was supposed to start the contractor e-mailed me letting we know he was too ill to do the job, so we were back to laying it ourselves. While it was an extremely time consuming task, I'm am glad we did it ourselves. Once we got going it wasn't very challenging and we were able to save a bit of money.
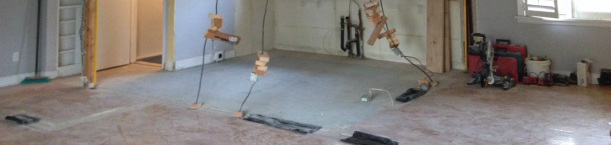
I mentioned in my post (Spray Foam, HVAC & Drywall) that we had the subflooring laid pre framing and drywall. However, they only put in enough screws to keep the boards in position. Just under 1000 additional screws still had to be added all along the seams and floor joists. This is very important if you do not want a squeaky or bouncy floor.
The first step was marking all the floor joists with a chalk line. Then I used an upright screw gun to drive all the screws in (by the way, this was a phenomenal triceps workout.).
The first step was marking all the floor joists with a chalk line. Then I used an upright screw gun to drive all the screws in (by the way, this was a phenomenal triceps workout.).

In old houses the walls are rarely (if ever) straight so they are not okay to work off of if you want your hardwood to be straight. We measured and measured and finally we got our starting point. Ty drilled down some wood planks to secure our starting point. We rolled out a wax paper to use between the subfloor and the hardwood. This isn't absolutely necessary, but it does act as a vapour barrier and makes sliding the boards around and knocking them into position a whole lot easier so I would recommend spending the extra $40/roll.

I knew laying the hardwood was not going to a quick process (especially with two perfectionists doing the job), but I hadn't imagined it would take THIS long. We started at 8am and by 4pm on Saturday we only had this much done.

Thankfully it was the layout that really set us back, so once we got moving the pace picked up slightly. By the end of the Sunday we had the kitchen-dining room area laid and the living room space remaining. That translates in to two full days (8am-9pm) to get us to just over the halfway mark.
The drywall guys were back that week so we had to protect our new floor. Just like we did on the starting side, we drilled spare planks of wood all along the edge to protect the floor's exposed tongues. Then I vacuumed the floor really well and taped down rolls of protective paper. As an added measure of protection the drywallers laid out fabric drop sheets.

Other projects kept us occupied over the long weekend and the following weekend Ty was away so the floor went partially finished for much longer than I would have liked. Not all progress was lost however, as while he was away I worked on staining and sealing the vent covers and stair nose. They took 3 coats of stain and 4 coats of sealer, but I think they are a decent colour match.


The following weekend I was away, but his brother Ryan and our friend Mike were nice enough to give Ty a hand. We weren't quite there yet, but the end was in sight.

Finally, one more full weekend of work and the hardwood is DONE. I am absolutely thrilled with the way the flooring turned out. I love the colour we chose and the consistency it creates on the main floor is exactly what I was hoping for.


Note: We purchased enough of this hardwood to install it upstairs in Phase 2.
 RSS Feed